Connecting to a Database
Scoop makes it easy to connect your business data from major databases—like Postgres, MySQL, Amazon Redshift, and Snowflake—so you can seamlessly blend, transform, and analyze datasets in one place. This guide will walk you through:
- Creating a read-only user in your database
- Whitelisting Scoop’s IP addresses
- Entering required JDBC connection settings in Scoop
Follow these steps to connect your database securely and start unlocking powerful analytics for your team.
1. Create a Read-Only Database User
A read-only user is important for security. This account ensures Scoop can view your data but not alter or delete anything. Below are examples for common databases. (Ask your IT or database admin if you’re not sure.)
Postgres
Run this SQL (replace myscoopuser and mypassword with your choices):
CREATE USER myscoopuser WITH PASSWORD 'mypassword';
GRANT CONNECT ON DATABASE mydatabase TO myscoopuser;
GRANT USAGE ON SCHEMA public TO myscoopuser;
GRANT SELECT ON ALL TABLES IN SCHEMA public TO myscoopuser;
ALTER DEFAULT PRIVILEGES IN SCHEMA public GRANT SELECT ON TABLES TO myscoopuser;
MySQL/MariaDB
CREATE USER 'myscoopuser'@'%' IDENTIFIED BY 'mypassword';
GRANT SELECT ON mydatabase.* TO 'myscoopuser'@'%';
FLUSH PRIVILEGES;
Amazon Redshift
CREATE USER myscoopuser PASSWORD 'mypassword';
GRANT USAGE ON SCHEMA public TO myscoopuser;
GRANT SELECT ON ALL TABLES IN SCHEMA public TO myscoopuser;
ALTER DEFAULT PRIVILEGES IN SCHEMA public GRANT SELECT ON TABLES TO myscoopuser;
Snowflake
CREATE USER myscoopuser PASSWORD='mypassword';
GRANT USAGE ON DATABASE MYDATABASE TO USER myscoopuser;
GRANT USAGE ON SCHEMA MYDATABASE.PUBLIC TO USER myscoopuser;
GRANT SELECT ON ALL TABLES IN SCHEMA MYDATABASE.PUBLIC TO USER myscoopuser;
Tip: Don’t forget to replace database, schema, user, and password values with your real info. If you’re unsure about permissions or SQL, your IT/data admin should help.
2. Whitelist Scoop’s IP Addresses
For Scoop to connect, your network or cloud DB firewall must allow incoming connections from Scoop’s servers. Add Scoop’s static IP addresses to your database firewall’s allow list.
- For details: Visit Scoop’s Network Connections and IP Allowlist page, or contact your customer success specialist for the latest list.
Tip: If you’re running a cloud database, use your provider's network rules section, e.g., Security Groups in AWS (RDS/Redshift) or Network Policies in Snowflake.
3. Entering Your Database Connection in Scoop
Now you’re ready to connect the database using Scoop’s point-and-click interface. Here’s how:
-
Go to the Datasets page and click the New Dataset button.
-
Select Application Report.
-
Choose Database as your source.
-
Pick if your dataset will be Transactional (updates each load) or Snapshot (tracks changes to the same records over time). If unsure, see Snapshot Datasets and Tracking Changes.
-
Enter your database connection details:
- Host: The database server or endpoint
- Port: Usually 5432 for Postgres, 3306 for MySQL, 5439 for Redshift, or as assigned
- Database Name (or Service/Instance, for Snowflake)
- Username and Password (use the read-only user you created)
- Schema (if required)
- Additional properties (optional, for custom needs)
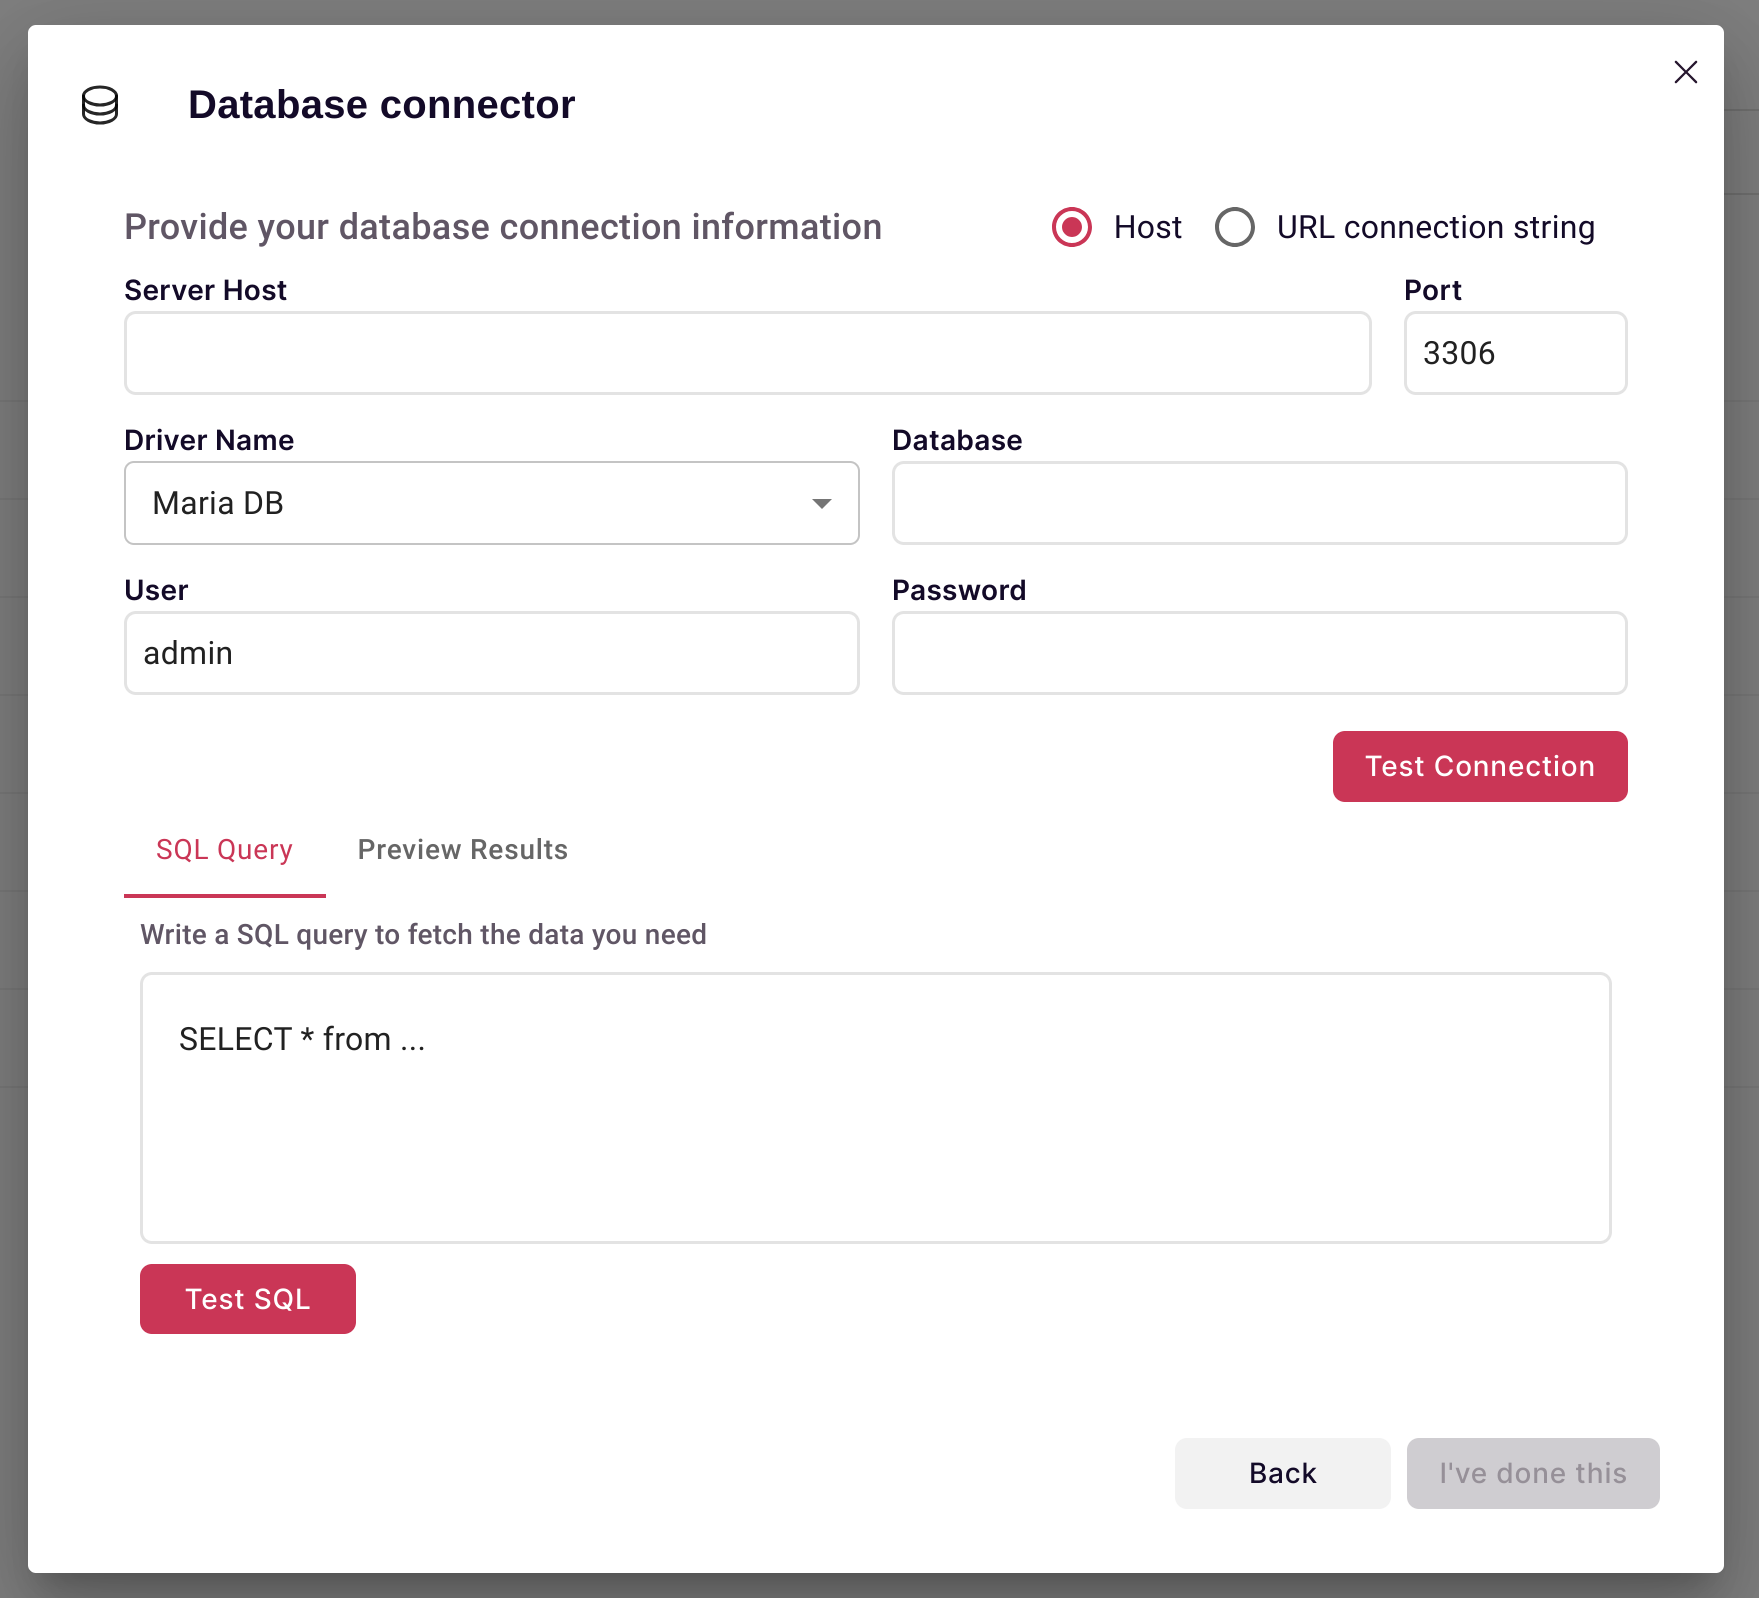
- Click Test Connection to verify settings. Scoop confirms a successful connection or shows an error if there’s a problem.
Tip: Only use a direct connection if your company allows it. If you need to connect through an SSH tunnel or VPN, check additional instructions or contact Scoop support.
-
Enter your SQL query in the provided SQL Query box. This query is what Scoop will run each time it syncs.^
- You might use something like:
SELECT * FROM sales_orders WHERE status = 'Open'.
- You might use something like:
-
Preview the results to confirm Scoop can read your data.
-
When you’re happy, click "I’ve Done This", then supply a name for your database connector/dataset.
-
Scoop will now automatically run your SQL once a day (or as scheduled) and keep your dataset up to date for analysis.
Tip: By default, Scoop never makes changes to your source database—queries are SELECT-only, and the connection uses read-only credentials for safety.
What’s Next?
After your dataset loads, you can start transforming, blending, and visualizing your results in Scoop using spreadsheet logic, powerful charts, and AI-driven analysis. Check out our docs on Working with Datasets and Data Preparation for inspiration.
Have questions or need help? Contact Scoop Support and our team will walk you through setup!
Updated 6 months ago